![]()

Project assignment 02 Single whirlpool dish.
Project objective.
To add water inlets and a plinth to the dish made in assignment one.
Assignment outcome.
A functional single whirlpool dish on it's plinth.
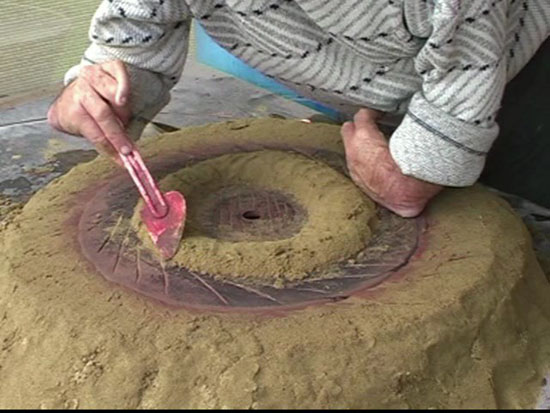
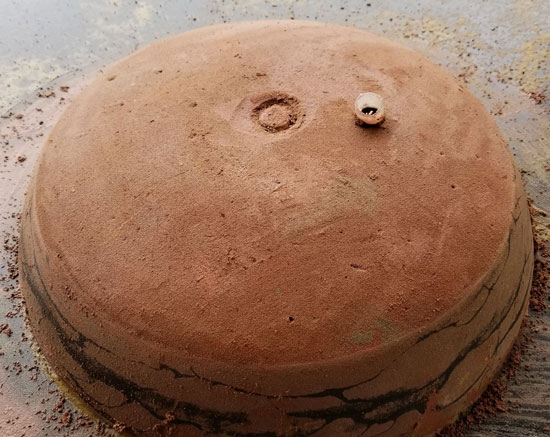
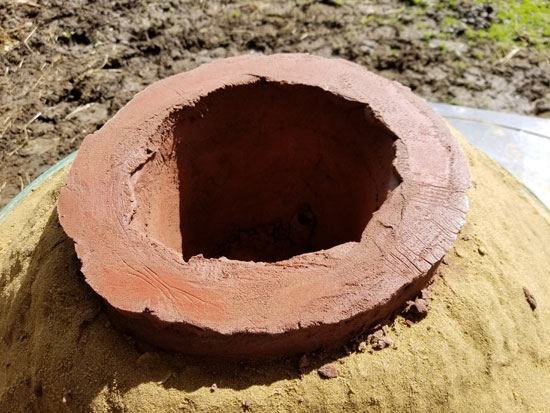
Begin by marking out the position for three water inlet holes. These are placed two thirds out from centre, are evenly placed at 120 degrees apart.
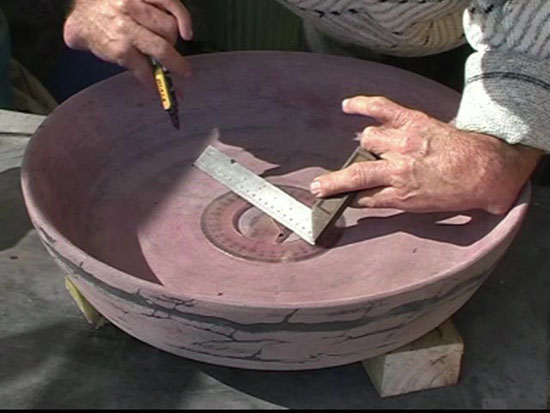
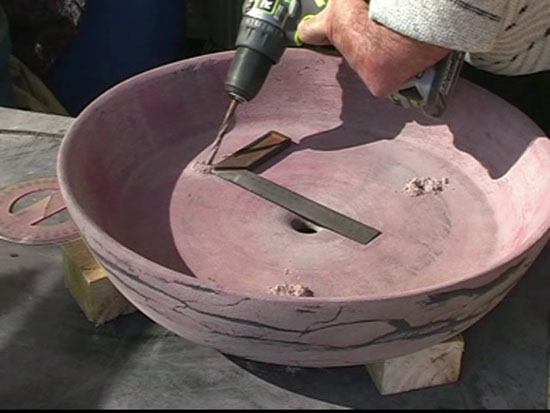
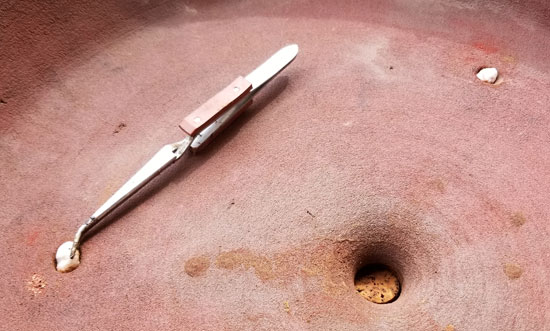
Drill a shallow pilot hole first so that your larger 12 mm concrete drill bit does not slip off it's position. Angle these holes to 45 degrees tilt and at a tidy tangent to centre. This is why the square is sitting near the hole as it is used as a guide to show the tangent line the drill is tilted on. Keep in mind that the concrete is still soft so be very gentle as you go.
Next we score the underside of the dish where new concrete is going to be. This scoring helps to key on the new material.
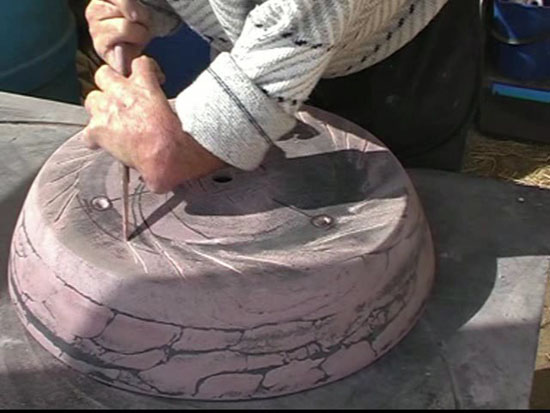
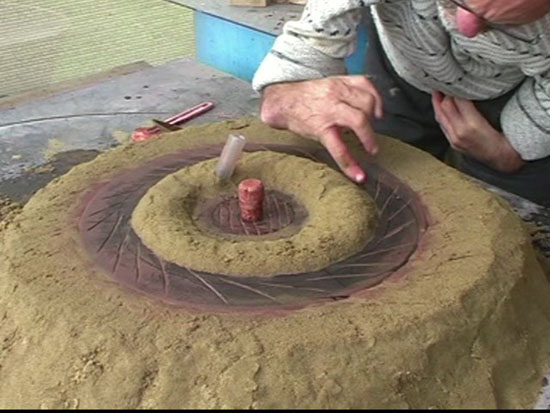
The water inlet holes are lightly plugged with cotton wool then topped up with sand. This stops any sand and water from passing through here when the new concrete layer is added on.
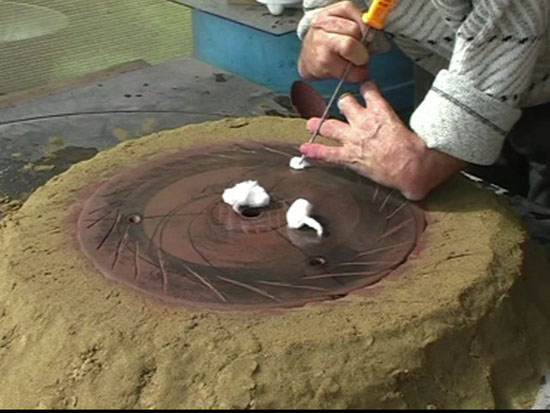
A ring of sand is now formed onto the dish. This sand ring makes what will become the water channel that joins the water supply hose to the three inlet holes.
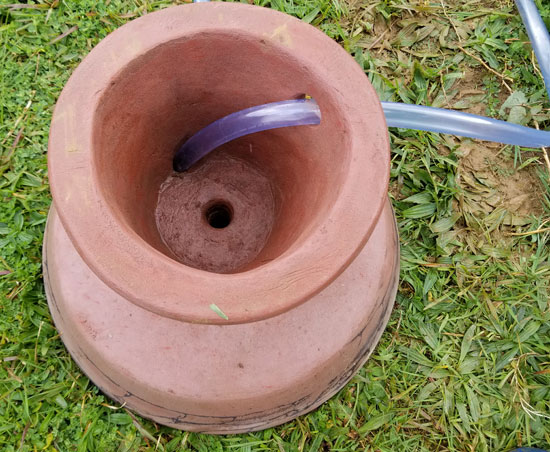
A cork is used at the dish centre to preserve the drain of the dish and a short length of supply hose is also inserted into the ring of sand. Please note that this hose is slanted in the same direction as the inlet holes in the dish below..
Concrete is now added over the entire underside of the dish to form a layer about 50 mm thick. Be careful not to disturb the ring of sand or shift the position of the water supply hose.
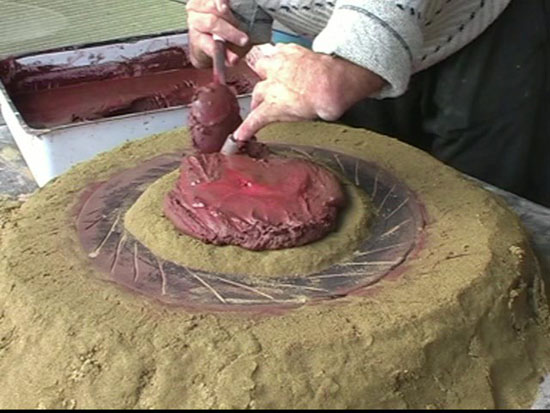
This layer is smoothed over and allowed to set over night. Notice the cap of the cork is visible.
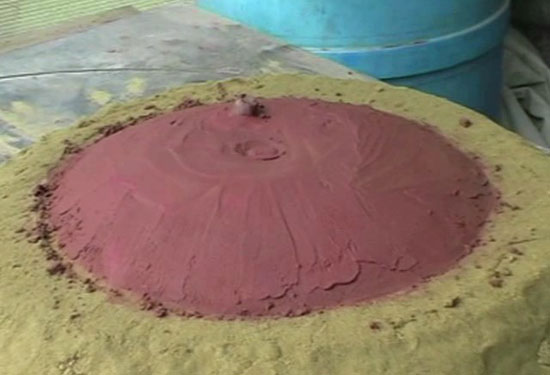
Next morning remove the sand pit around the dish. Remember to avoid contaminating the sand pit sand with concrete lumps of any kind.... The new layer can now be surface carved to an even, smooth finish. The water inlet hose can be removed and the cork can also be carefully extracted by drilling it's centre away then pushing the thin shell left through from the top side.
Be very careful when turning it over / upright. In fact you should wait until it has had time to harden up. I suggest another two days before lifting off the workbench for the first time, and when you do, the entire item should be rested on a bed of sand so that it's weight is supported broadly across it's new bottom!
The cotton wool plugs can now be removed as well as the remaining shell of cork. We also need to get the ring of sand out so that the water channel is clear. Turn the dish upside down and squirt (jet setting) water into the water supply hole. Sand will back flush and clear the channel way. When water is flowing freely through the 3 outlet holes this task is done. If there is a clog, a flexible wire can be prodded into the blockage to free it...
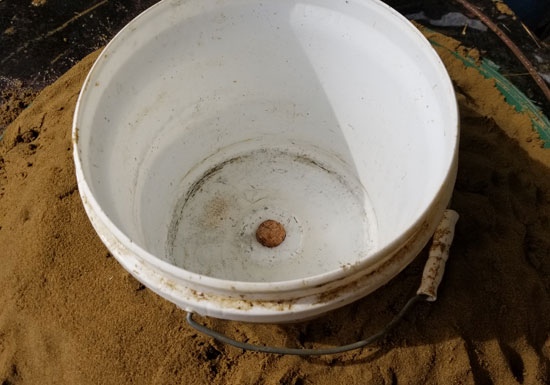
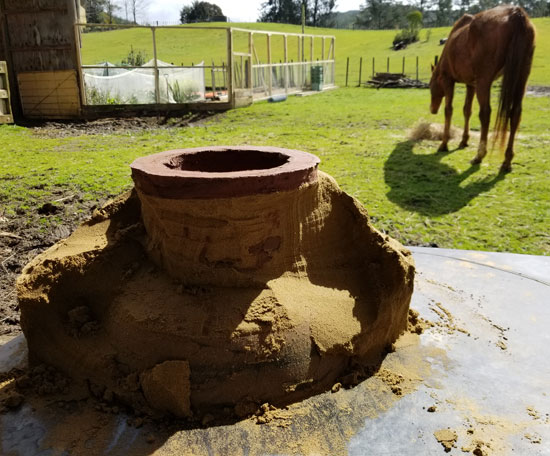
The final major step is to build a plinth. In this case the plinth is made directly onto the dish. As studied earlier, build the plinth by forming a sand mold. I have selected an eight litre paint pail, drilled a 25 mm hole at centre in it. This hole positions the pail onto a cork that is inserted in the drain hole of the dish. By doing this we can be sure that the plinth will be correctly centred onto the dish below.
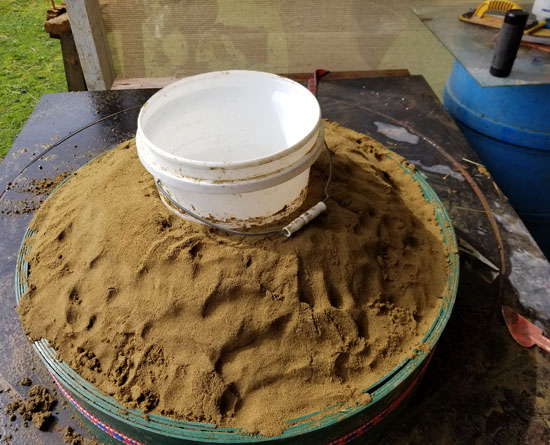
This photo below shows the sand pit covering the entire dish and forms up around the pail. To remove the pail give it a slight turn and it will come free of the sand cleanly.
Just before adding concrete for the plinth, another piece of water supply hose is inserted into the supply hole. The plinth wall is build around this hose.

Build up the plinth walls, add a shelf of concrete around the top about 25 mm deep and level off as best one can by eye...
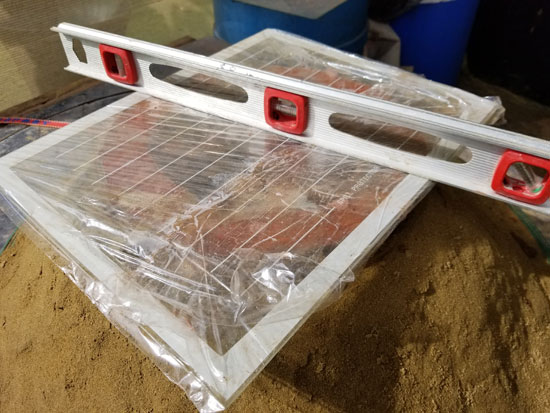
A square of glass wrapped once with cling film is placed on top and lightly wriggled down flat. Have a level there to assist with getting this face true. It needs to be as level as you can make it. Leave it in position and let set over night.
This needs to rest for two days before removing it from it's sand pit. You now need to carve the walls of the plinth tidy (inside and out) and also shape the foot of the plinth into a pleasing form.
As a single item, it is going to be rather heavy. This one is about 30 kg's so handling it has to be done thoughtfully so that it's weight is not applied onto it's new / soft edges!! I would recommend you do NOT attempt to turn it upright until the plinth is at least four days old and when you do, be mindful to not stress it's edges! You HAVE been warned....
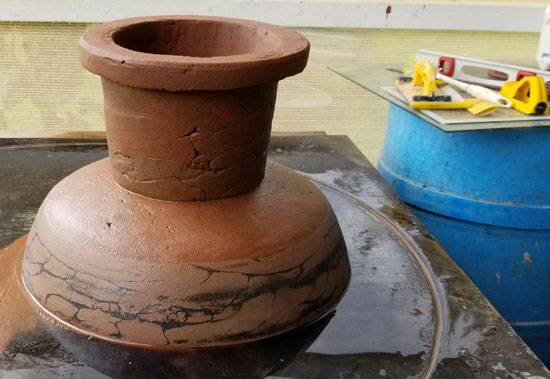
Notice a side entry hole has also been drilled / carved into the plinth wall so that the supply hose can get access to it's hole.
Youtube support tutorial for assignment one
Well done, we now have our first working single whirlpool dish... :-) Lets sit back and watch it spin.
![]()
![]()
Whirlpool
tutorials
Project assignments
Single whirlpool dish.
![]()
![]()