Building a plinth on which the dishes rest is the last major task. It needs to elevate the sculpture high enough to lift it's bottom side from the surface of the pond it's resting in. It also needs to hold it at a nice level attitude. Thus, your pond floor needs to be level ground too. If it is not, you'll need to make it so before the finished sculpture is set in place. One can fine tune the final level across the dishes by using 3 woodern wedges placed under the plinth base however our concrete building should always try its best to be mindful of keeping level...
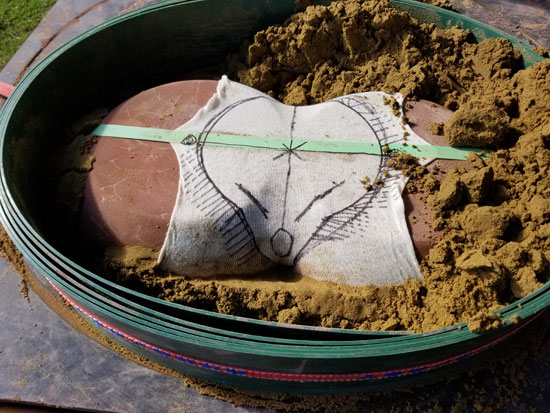
The plinth also provides the water supply to the dishes. In the photo below you'll see that the oval inlet hole as seen drawn onto the cheese cloth and the X marks the position of the incoming tube.
Build the plinth directly on top of the inverted dishes. Lay down a piece of cardboard below the upside down dish. This balances out the weight of everything above it, and is there to save us from many tears of a broken dish.
A releasing membrane is used to make sure the new cement does not stick to the dishes. I use two layers of cheese cloth for this purpose. Mark onto it where the plinths outer edge will be and also the channel from centre dish to the inlet hole.
One can now fashion on a channel of sand and position a sample of water hose on it's home spot.
The base plate for the plinth can now be spatulaed into place. Notice it has an arm that wraps over and beyond the sand channel we've just covered over. This is left over night to give it time to set, then the plinth tower is fashioned directly in top of this cradle..
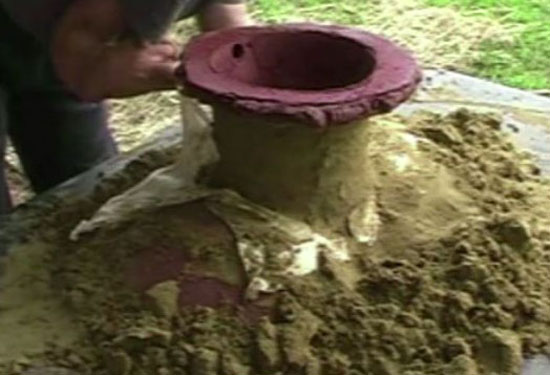
Sand is now molded above the dish to provide plinth walls. Make use of a correct sized plastic plant pot. Not only is it a nice circular form, it also has a taper we like to use. It is a quick solution for an otherwise long process of using a profile cutter..
Pack sand around it to a desired depth, then with a wriggle and twist the pot will lift cleanly from the sand. The horizontal plane is leveled off and checked it is indeed level before you carefully finish it off with a rounded bevel.
The photo above shows I've just filled on top of the prior layer and am about to spatula in the walls.
Notice the side water supply entry and bottom entry tubes are built into the side wall. These are flexible, clear plastic tubes. A 20mm dia. will suffice here. This ensures a tight / tidy fit however, one can also drill a hole in the side later on if it's not set in place now..
Pulling on the cheese cloth layer closest to the dish will separate the new cement from it's parent surface. I have found that two layers of cloth are necessary to achieve separation..!
The plinth can finially be carved to a nice finish. Some rasping and wet sand papering will remove unwanted bumps and extra curves.
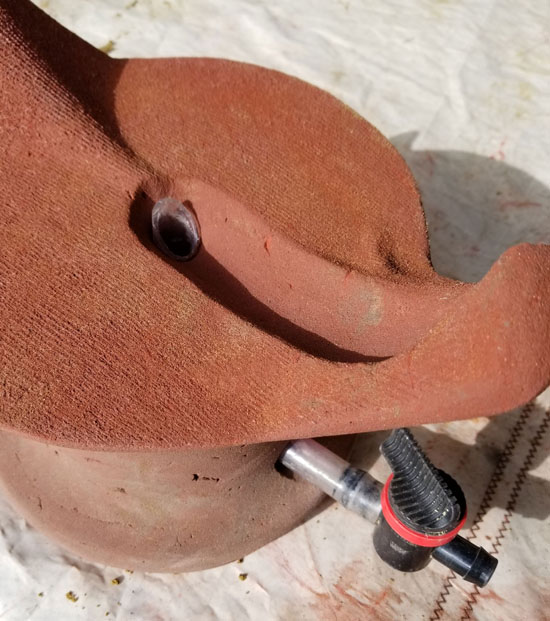
Measure and cut water tubing to fit the plinth in a tidy fashion. You'll notice a tap is positioned for easy access.
and water tubes attached ready for positioning in it's pond.
The plinth can also double task as a water supply / hidden reservoir. In this case there is no pond and so these sculptures are totally free standing items.
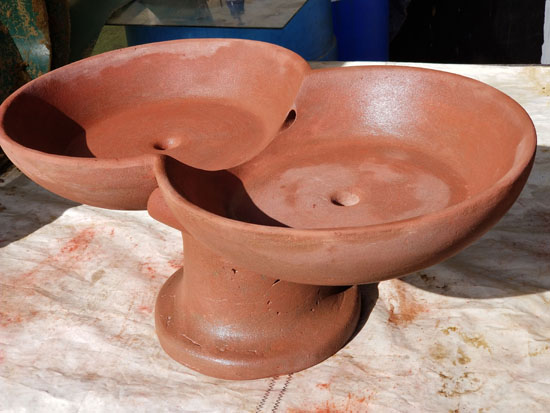
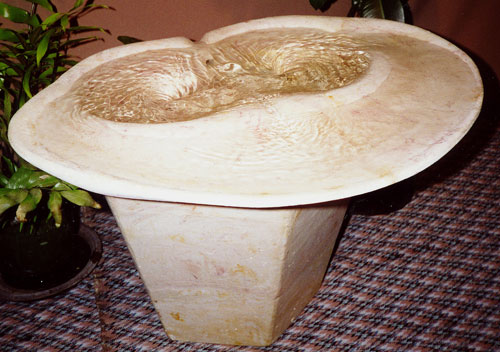
This bird bath is a twin dish with an added shelf on it's front. The plinth was made separately then a few days later it is inverted and joined to the bottom side of the bird bath with a cement interface layer. Cheese cloth is also used here to separate the two items from each other.
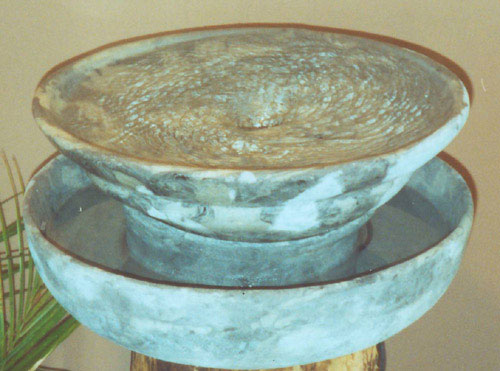
A third option is to made a dedicated basin for your whirlpool dish.
The pump may now be hidden inside the plinth tower. Hidden pumps are all good providing you match the flow rate of pump to the needs of the sculpture. The down side here is not having easy access to maintain the pump and not having a water flow tap within reach.
In the photo example below you can see this single dish is occalating and near brimming full, the water in the basin is about half empty. The wee pump is plumbed directly to a bottom side entry, no tap... One can only tune the sculpture to "that" pump by widening out the whirlpool drain hole with a rat-tail rasp, however there is no turning back from widening this drain so proceed with caution...